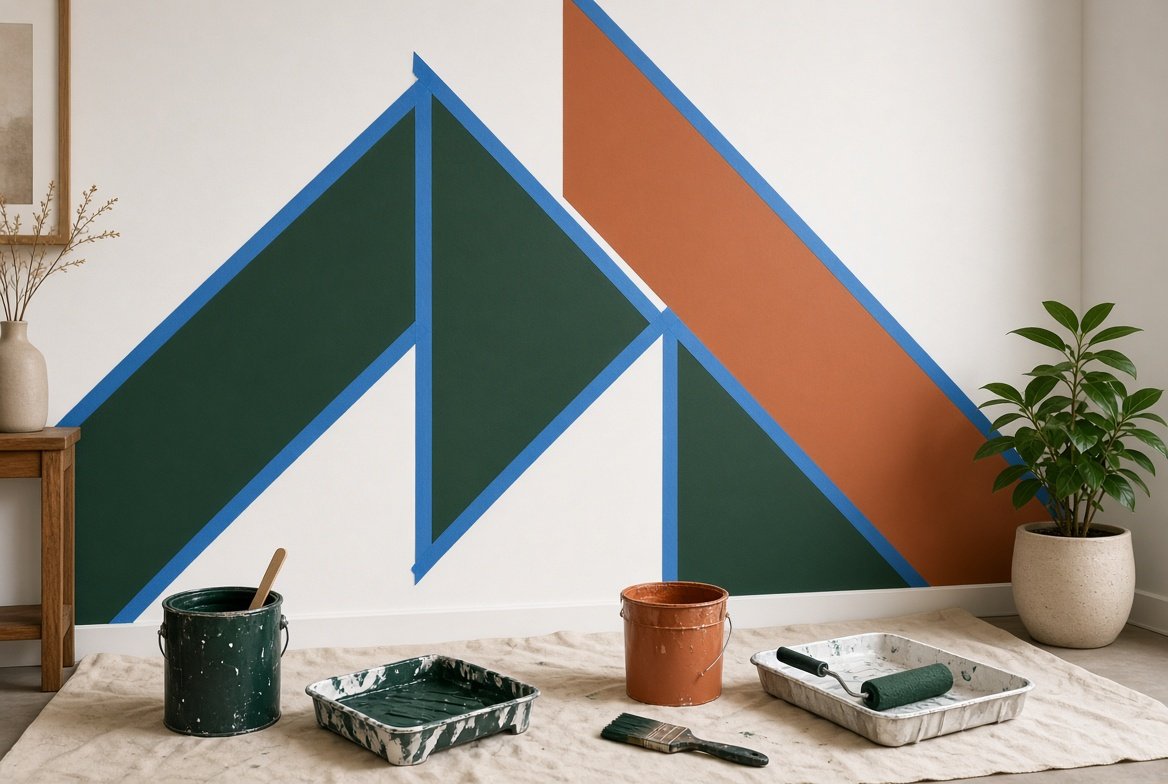

Geometric wall painting turns a plain surface into a bold, modern statement using nothing more than paint, tape, and careful planning. Clean lines, sharp angles, and repeating shapes create visual energy that instantly elevates a bedroom, living room, hallway, or home office. The best part? You do not need freehand artistic skill. The secret is almost entirely in the tape.
This complete guide walks you through every major geometric technique — from simple vertical stripes to complex chevrons, triangles, and diamond grids — with precise tape methods that deliver professional-looking results even if you are a complete beginner.
[Image Prompt: Modern living room with a large geometric accent wall featuring bold navy and white chevron pattern behind a minimalist sofa, natural daylight, clean contemporary style]
Why Geometric Designs Work So Well
Geometric patterns add structure and rhythm to a room. They draw the eye, create depth, and can make a space feel larger or more intimate depending on the scale and color contrast you choose. Unlike freehand murals, geometric designs rely on measured lines and tape, which means the process is repeatable and far less intimidating.
These techniques are especially effective on accent walls, but they can also be used on a single section of a wall, behind a bed, or even on a ceiling for dramatic effect. Because the designs are created with tape, mistakes are easy to correct before paint is applied, making this one of the most forgiving advanced DIY projects.
Essential Supplies for Geometric Wall Painting
- High-quality painter’s tape (blue or green, medium adhesion — avoid cheap tape that bleeds)
- Measuring tape, pencil, and level (or laser level if available)
- Ruler or long straight edge
- High-quality angled brush (2–2.5 inch)
- Paint roller and tray
- Paint in 2–4 complementary colors (or one accent color + base)
- Drop cloths
- Sandpaper and primer (if needed)
- Plastic card or credit card for sealing tape edges
- Optional: chalk line, painter’s triangles, or a projector for complex patterns
Step 1 — Plan Your Design and Scale
Before any tape touches the wall, decide on the pattern and its scale.
Popular geometric options:
- Vertical or horizontal stripes (simplest)
- Chevron / zigzag
- Triangles (equilateral or irregular)
- Diamond / harlequin grid
- Hexagon or honeycomb
- Color-block rectangles or asymmetrical shapes
Measure the wall height and width. Sketch the design on paper or use free digital tools to visualize proportions. Larger shapes feel calmer and more modern; smaller, denser patterns feel busier and more energetic. For most rooms, shapes between 12–24 inches work best.
Mark key reference points lightly with pencil. Always start from the center or a dominant architectural feature (such as the middle of the wall behind a bed) so the pattern feels balanced.
Step 2 — Prepare the Wall Exactly as You Would for Any Accent Wall
Clean, repair, sand, and prime if necessary. A smooth, clean surface is critical because geometric designs highlight every imperfection. Apply your base color first and let it dry completely (ideally 24 hours) before taping. Working on a fully cured base coat prevents the tape from pulling up the underlying paint.
Step 3 — Core Tape Techniques for Sharp Lines
The quality of your lines depends almost entirely on how you apply and seal the tape.
Basic Tape Rules
- Apply tape to a completely dry, dust-free surface.
- Press the tape down firmly along the entire edge with a plastic card.
- After pressing, run a thin coat of the base color (or clear sealant) along the tape edge and let it dry. This seals microscopic gaps and dramatically reduces bleed.
- Remove tape while the final accent paint is still slightly tacky, pulling at a 45-degree angle away from the painted shape.
Pro Tip: For multi-color designs, tape and paint one set of shapes at a time. Let each color dry fully before applying the next set of tape.
Step 4 — Technique-by-Technique Guides
1. Classic Vertical or Horizontal Stripes
Measure and mark equal intervals. Apply tape along the pencil lines. Paint the open sections. This is the easiest geometric design and an excellent first project.
2. Chevron (Zigzag) Pattern
- Decide the peak height and width of each chevron.
- Mark the centerline of the wall vertically.
- From the center, measure equal horizontal distances and mark the high and low points of each zigzag.
- Connect the points with light pencil lines or a chalk line.
- Apply tape along both sides of each zigzag line.
- Paint the alternating sections.
- For a modern look, use two colors; for higher impact, use three.
3. Triangle Patterns
Equilateral triangles create a clean, modern look. Mark a horizontal baseline, then measure equal points along it. Use a level or large triangle tool to draw the diagonal sides. Tape carefully along all three sides of each triangle you want to fill. Paint, remove tape, and repeat for the next set of triangles if using multiple colors.
4. Diamond / Harlequin Grid
Create a grid of diamonds by first marking equally spaced vertical and horizontal lines, then connecting the midpoints diagonally. Tape along the diamond outlines. This pattern looks especially sophisticated in two tones (e.g., soft gray and white or deep green and cream).
5. Color-Block Geometric Shapes
For a more abstract, contemporary result, tape large irregular or overlapping rectangles, squares, and triangles. This style feels less rigid and works beautifully with three or four complementary colors.
Step 5 — Painting Order and Multi-Color Strategy
Always paint from the lightest color to the darkest when possible, or complete one full set of shapes before moving to the next color. Remove tape after each color while the paint is still slightly wet. If you need to re-tape over freshly painted areas, wait until the paint is fully cured (usually 24 hours) or the new tape may lift the previous layer.
Common Mistakes and How to Avoid Them
- Using low-quality tape that bleeds or tears.
- Skipping the seal coat along the tape edge.
- Removing tape after the paint has fully dried (causes peeling).
- Measuring inaccurately, which makes patterns look crooked.
- Choosing shapes that are too small for the wall size (creates visual noise).
- Applying thick coats of paint that seep under the tape.
Frequently Asked Questions
How do I keep lines perfectly straight on an uneven wall?
Use a level for every line and accept that older walls are rarely perfect. Slight variations are less noticeable once furniture is in place.
Can I do geometric designs in a rental?
Yes. Use the same approach as a regular accent wall and plan to repaint the entire wall neutral when you move out.
What is the easiest geometric pattern for absolute beginners?
Wide vertical stripes or large simple triangles.
How long should I wait between colors?
At least until the paint is dry to the touch, ideally overnight for best results when re-taping.
Do I need a laser level?
No, but it makes complex patterns significantly faster and more accurate. A regular spirit level works fine for most designs.
Final Thoughts
Geometric wall painting is one of the highest-impact DIY techniques available to beginners because the tape does most of the hard work. Measure carefully, seal your tape edges, work in thin coats, and remove the tape at the right moment. The result is a custom, magazine-worthy wall that looks far more expensive and complicated than it actually is.
Start with a simple stripe or chevron on a single accent wall this weekend. Once you master the tape method, more complex patterns become surprisingly achievable. The only real limit is how bold you want to go.